Product Overview
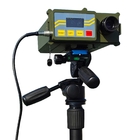
The handheld laser rangefinder is a new generation of military telescope type rangefinder that integrates modern electronics, optics, and laser technology to accurately measure distance. It has small size, light weight, long range, simple operation, less range error, good sealing performance and High reliability. It is suitable for distance measurement in military observation, waterway, riverbed, post and telecommunications cable and power cable erection, oil field, mine, railway and highway construction survey and other fields, and set up standard RS232 serial interface and mechanical connection interface, It can easily realize signal transmission, and it can be used with angle measuring instrument to realize the determination of target orientation.
A. SPECIFICATIONS
1 Location parameter
- Max range:10000m
- Measuring range:30m ~ 10000m
- Ranging error:±1m
- Gate:20 ~ 5120m (step 10m)
- Accuracy rate :98%
- Working frequency:1/6 ~ 1/3 Hz
- Compass Accuracy:±0.5°
- Precision of angle:±0.1°
⒉ Functions
- Get average data
- Save data(max 1000)
- Transmit data(output: RS232,2400,8,N,2)
- Adjust the brightness of screen and reticle, close the light when no operation in continuous 20 seconds.
- Count work times
- Index last ten data
- View battery life
- Query serial number
- Query storage data
⒊ Optical parameters
- Receiving diameter:Φ42mm
- Field of view:5°
- Magnification:10X
⒋ Laser parameter
- Laser type: Nd:YAG
- Wavelength: 1.064μm
- Output energy: ≥8 mj
- Life: ≥20000 times
⒌ Working temperature
-10℃~+ 60℃
⒍ Environmental adaptation
Dustproof waterproof shockproof
⒎ Mechanical parameters
- Size:180mm*210mm*95mm
- Weight:1.5 Kg
⒏ Power supply
18650 batteries(11.1V,3000 mAh),At normal temperature working life over 3000times
B Working principle
Pulsed laser rangefinder determine the distance of the target by measuring the time t which the pulse round trip between rangefinder and target.
Set the distance t between rangefinder and target is L, and the speed of light in air is C, then:
L = 1/2 * c * t ( c = 3 * 108 m/s)

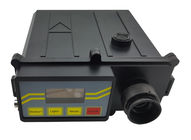
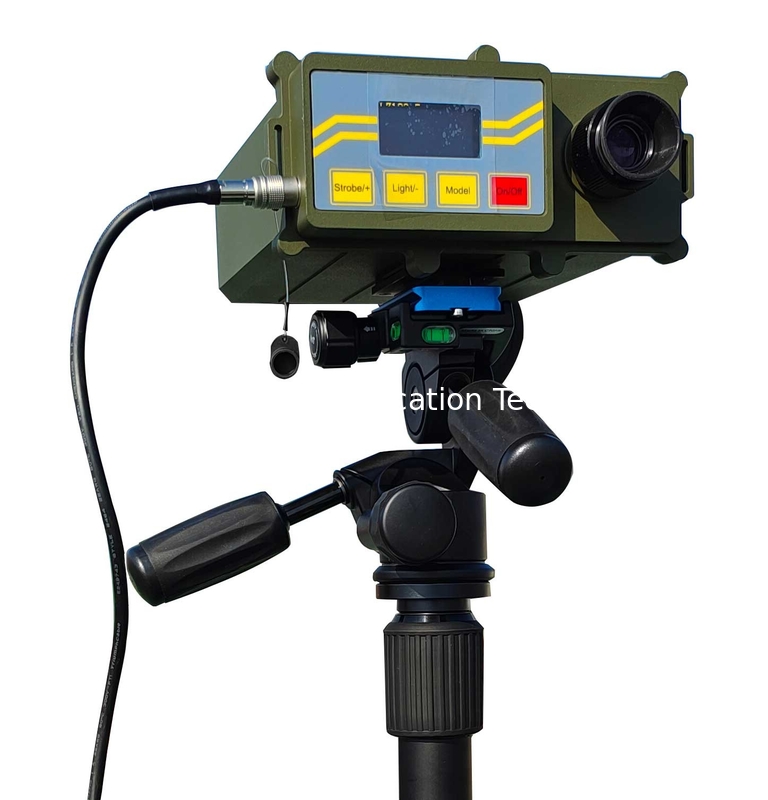
C. Structure and function
The mechanical structure of the rangefinder is monocular two-in-one light path structure. (as receive and aim use one light path, emit light path independence
- Trigger key emit Laser.
- OLD screen display data:Range value,Azimuth angle,Pitch and opteration function character.
- Connect plug: transmit data between range finder and Peripheral equipment.
- Gate/+ :Long press as strobe in normal state,Up key Numerical correction or menu selection.
- Light /- :Long press to on normally/Turn off panel lighting(LED on/off),Down key: Numerical correction or menu selection.
- Model key: enter menu.
- On/Off Power on, quit the current state.
- Ocular Aim at the target.
D. General use
- Short press the instrument button "Power/Reset", and the display screen will display the company LOGO. After 1 second, the normal display interface will be entered.The left side of the first line displays distance information; The top right corner shows the battery level.
3pcs of BT 70-100%
2pcs of BT 40-70%
1 pcs of BT 10-40%
0pcs of BT Below 10%
General use
The second row shows the azimuth, pitch Angle, azimuth is 360° display, is north display N000.0°, gradually increasing to the east, the largest For N359.9 °; Pitch Angle display range of ±45°, display as "<±XX.XX°"
The third row shows the intermediate result value. In the normal ranging state, it shows the horizontal and vertical distance of the target "HXXX.x m VXX.x m"..
The fourth line displays menu options, normal ranging blanked, menu options are displayed after pressing the menu key.
- Aimed at the target through the observation eyepiece, and the observation eyepiece in the center of the cross line at the target, adjust the view adjustment circle, so that the target image is the clearest.
- Press the trigger button and the instrument starts ranging and displays one of the following results:
- The first line of the LCD screen shows the distance of the target to aim at. Such as "S - 1234.5 m". Where "" means that there are double targets in the ranging. Press the arrow button to display the second target, such as" S-2345.0m "; Press the arrow button again to display the first target distance value. If there are no double targets, the symbol will not be displayed "" .
- "AAAA.Am" indicates that no target is detected or that the target is out of range.
- “0000.0m” Indicates no laser output.
- The second row of the LCD screen displays the azimuth and pitch Angle of the target. Such as “N135.5°<+22.35°”
- If display window upper right corner symbol “ ” ,It means that the current is low and the battery needs to be charged or replaced.
- At the end of each normal ranging, i.e. the valid ranging value and Angle value is obtained, the current ranging value will be automatically sent through the serial port in ASCII format.
E. special use
In addition to the normal ranging function, the unit has auxiliary functions as a special use, such as Gate, average, data save, data transmit, angle measurement, data index, data delete, brightness adjustment. etc
Gate(+),Light(-),Mode The three keys are functional keys,Under the normal ranging state,there is no prioritydistribution between them, and they can be switched at will.But aftering the menu function,you can only use the “+”or“-”,select the function and numberical correction.
- Gate function: if there are multiple targets in aiming light path, the unit could do ranging selectively by use the Gate function. The range of the Gate is 20 ~ 5120m.
- Press Gate key after power on, the unit display “MGR: 0020m ” what means the min limit of ranging is 20m. press up/down key could correct the Gate value.
- Press trigger key after correct the Gate value, the unit get the distance of the target behind the Gate value
- During correcting the Gate value, press the up/down key once, the value plus/minus 20m, hold pressing the up/down key, the value plus/minus 100m every 0.3 seconds.
- If you press the “strobe(+)”key after a normal distance measurement,the current distance measurement value plus 10m will be automatically set to the current strobe value.
- Average function: as it need accurate measurement, the unit could do average range. The effective average times are 1~100.
- As the number of range times is 101~110, it will be continuous measurement
- Press model key after power on, the screen display the model menu. The flash words is the function which be selected. Press up/down key to select “AVG”.
- Press model key to confirm, the unit enter average function. The screen display ”NUM=001”, the unit is in single range state.
- Press up/down key to correct average times, short press to plus/minus 1 every time and long press to plus/minus 10 time per one time.
- Finished adjusting the average times, press model key to confirm, the screen should display ”Average Ready!” and the unit can enter average ranging.
- Aim the target as commonly use, then press trigger key, the unit will range auto and display the result every time. When finished range, it will display the average data, as “a(100):1234.5m”, it means average range 100 times, and average value is 1234.5m.
- During step ①~⑤, the unit turn back to the last step by each press reset key.
- During the auto average range, the unit quit average range when get invalid data three times, and display “Average Error!”. If press reset key during average range, the unit quit current state, and display effective times and average value.
- The unit will not transmit the data during average range, until the range finished.
- The nomal work frequency is 1/3 Hz (20rpm).
- It is none key but “reset” could work during the average range.
- Save function: the save function could be used when it is difficulty to recode data at work place or need to process data with computer.
- Press model key after power on, the screen display the model menu. The flash words is the function which be selected. Press up/down key to select “SAV”.
- Press model key to confirm, the unit enter save function. The screen display ” STOP [A] [B]”, and the“[A]”is flashing. It means the storage area A is selected currently. The storage area could be selected with up/down key. ”STOP” means stop use save function.
- Press model key to confirm the storage area, the unit display as “SD-A010”, it means the current storage area is A, and it has 10 effective data.
- Press model key again, the unit turn back to step ②, and could select storage area.
- Press reset key to quit current state.
- Boot defaults is not stored state,each time after shutdown,storage state is not saved,need to be rest.
- The unit has A,B,C,D four storage areas which could save 250 data each one. It could store total 1000 data, and the data will be saved when power off
- The data will save in storage area B when storage area A is full, and so on. The unit will display ‘Data Full!’ when the four storage areas are all full
- Transmit function: the transmit function could be used when it need to sent the data to a Peripheral equipment processing.
- Connect the unit and Peripheral equipment with the cable. The function of the pins are shown in following table:
| PIN |
Function |
| 1 |
GND |
| 2 |
VDD |
| 3 |
Switch |
| 4 |
TXD |
| 5 |
RXD |
| 6 |
CHARGE |
- Press model key after power on, the screen display the model menu. The flash words is the function which be selected. Press up/down key to select “TXD”
- Press model key to confirm, the unit enter transmit function. The screen display ” [A] [B] [C]”, and as the“[B]”is flashing, It means the current selected transmission area is B. The transmission area could be selected with up/down key
- Press model key to confirm the transmission area, the unit display as “TXD-B Running”, it means the data in storage area B is sending. Then the unit display as “TXD-B End”, it means the transmission is completed. If there is no data in selected transmission area, the unit display as ‘(B)-No Data!’ and do not transmit
- Press model key again, the data in selected transmission area will be transmitted again
- Press reset key to quit current state.
Note:At single range state, the unit transmit a value after every ranging. At average range state, it only transmit the average value and range times once after the whole average range finish
- Data index function: View store data and some data related the instruments.These include:10 Most Recent data retrieval(Ltd),are data retrieval(Sei),ptoduct serial number display(s/N),battery life display(Bat) and range number display(Lif)
- index ten nearest data: show the ten nearest data after power on, press up/down key to look up.
- Data index : display the range value in the four storage areas.
- Product serial number : displays the equipment serial number.
- Range times: check the cumulative number of the unit ranging.
- Brightness Adjustment Function:It is used to sdjust the brightness of OLED display and the brightness of dividing board when then lighting is on.Press the “mode”button when power on,the instrument display mode menu,press the “+” or “-”button to select “ADJ”
- Press the “mode” button to confirm,then enter the brightness adjustment function,At this point,the menu shows “VIEW LED ECP”,Which means OLED display panelbrightness adjustment,partition panel brightness adjustment,Azimuth module calibration,press up and down key to choose OLED display or partition panel brightness adjustment.
-
- Press the "mode" button to confirm, and the current stored lighting level will be displayed. OLED display and reticule lighting are divided into four levels,With 1~4 numbers, the larger the number, the higher the brightness of the display.
- Press the "Reset" button to exit the above states in turn.
- ECP is used for attitude sensor self-calibration. Place the rangefinder horizontally to select "ECP" and press the mode key to confirm it. Begin to rotate the rangefinder slowly and uniformly in the clockwise direction (more than one turn). See the screen display from "0%" to "100%" and press the mode key to finish self-calibration. Select the installation Angle compass to have this function
- Data deletion: If you need to clear the data in the instrument storage area, you can use the erase function.
- After power-on, press the "Mode" button, and the instrument will display the mode menu, in which the flashing is the currently selected function name, and press the "+" or "-" button to select ”DEL”.
- Press the "Mode" key to confirm, then enter the data cleaning function. When "[A] [B] [C]" is displayed, where "[B]" means that area B is currently selected, and the upper and lower keys can be used to select 4 areas A, B, C and D.
- Press the "mode" key to confirm, then the selected data will be cleared. For example, "B-deleted!" is displayed. , indicates that the data in zone B is cleared.
- Press the "Reset" button to exit the above states in turn.
Note:Once the data has been deleted, it cannot be recovered.
F. Erection
If it is need to measure distant target steadily and reliably, the unit could be mounted to tripod with the 1/4 screw on butten plant, or be mounted to theodolite with dovetail groove on butten plant and Special switching mechanism. The unit could be remote used by external trigger cable.
G. Battery
- This instrument uses an 11.1V, 3000mAh dedicated 18650 lithium ion battery pack.
- When the instrument shows that the battery is under voltage, please charge or replace the special battery in time.
- To prevent injury or fire, do not allow metal objects to touch the battery electrodes.
- To prevent damage to the battery pack, do not open the pack and keep the battery dry
- Do not put the battery in the fire (there is a risk of explosion).
- It is recommended to use the matching special charger to charge the battery pack. The use of inferior charger may cause harm to the battery pack.
- When charging the battery, please keep the ambient temperature between 0 ° C and 40 ° C, and the relative humidity is less than 80%. Improper use environment may cause damage to the battery performance.
H. Use of charger
Insert the output plug of the charging adapter into the instrument socket, and then plug the plug of the charging adapter into the AC 100~240V power supply. At this point, the red indicator light of the charging adapter is on, indicating that charging is under way. Red indicator lights off after full, green indicator lights on. After charging, unplug the charging adapter from the AC power supply, and then unplug the output plug from the instrument socket.
I. maintenance
- regularly check the appearance of the instrument and remove the dirt, grease and mildew on the surface in a timely manner.
- Soft dry cloth should be used when cleaning eyepiece, objective lens or laser emitting window. It is strictly forbidden to scratch with hard objects to avoid damaging optical properties.
- This machine is a high precision instrument of optical, mechanical and electrical integration. It should be handled with care in use. It is strictly prohibited to squeeze or fall from a high place to avoid damaging the instrument.
User is limited to change battery and do some calibration without open the instrument. Contact us when the fault is happened. Do not open the instrument without permission to avoid hurt by high-pressure or make fault worse.
J. Warranty
We warrant the unit against deficiencies in materials or workmanship for one year from date of purchase. This warranty does not cover deficiencies caused by accidental damage, wear and tear.
This product is lifetime maintenance, we just charge the test and material cost when it out of warranty.
K. packing list
| Number |
Name |
Quantity |
| 1 |
Case |
1PCS |
| 2 |
Rangefinder |
1PCS |
| 3 |
Charger |
1PCS |
| 4 |
Battery |
1PCS |
| 5 |
External trigger cable |
1PCS |
| 6 |
Flannelette |
1PCS |
Warning: the unit mustn’t do range function when there is an obstacle in 30m!